To add a reviewer to approval routing:
1. First, route a media file through approval. You can do this in two ways:
- From within a Project: Click the 3-dot menu in the lower-right corner of a media thumbnail, and select “Create approval routing.” If you'd like to route multiple media files for approval in a bulk approval, hover over the media thumbnails you'd like to select and check the box in the top left corner. Once you select multiple media files, a multi-select menu will appear that will allow you to "Create approval routing."

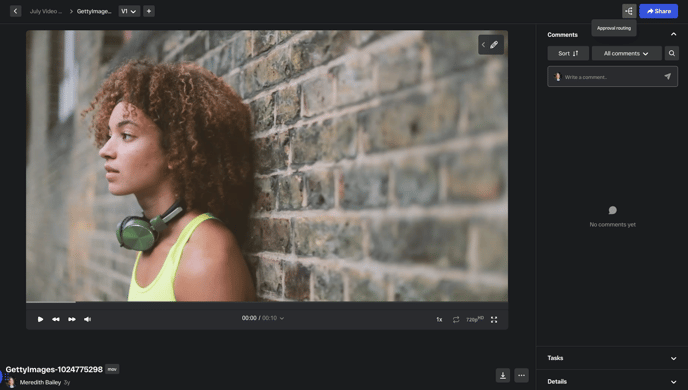
- From the Media Viewer: Open the media file by clicking its thumbnail, then select the approval routing icon in the top-right corner of the screen.

2. Once you’ve selected media files for approval, the workflow builder will automatically launch. You’ll be prompted to name your routing, then choose whether to build a new approval workflow or apply an existing template.

3. Next, the media picker will appear, allowing you to add additional media files to the approval routing or remove any you don’t want included. Once you’re satisfied with your selection, the workflow builder will guide you to the ‘Stages’ step to begin setting up your approval workflow.

4. In the ‘Stages’ step, begin by naming the first stage of your approval workflow and setting a due date and time for reviewers to submit comments and decisions. Once that’s complete, click ‘Add stage reviewers’ to start assigning stakeholders to the stage.

5. To add a reviewer, type in their email address or select their name if they’re already part of the workspace. They’ll appear in the reviewer list where you can set their permissions. By default, ‘Comment,’ ‘Approve,’ and ‘Download’ are enabled, but you can toggle these on or off for each reviewer as needed. At least one reviewer per stage must have "Approve" decision ability in order for approval routing to be set-up.
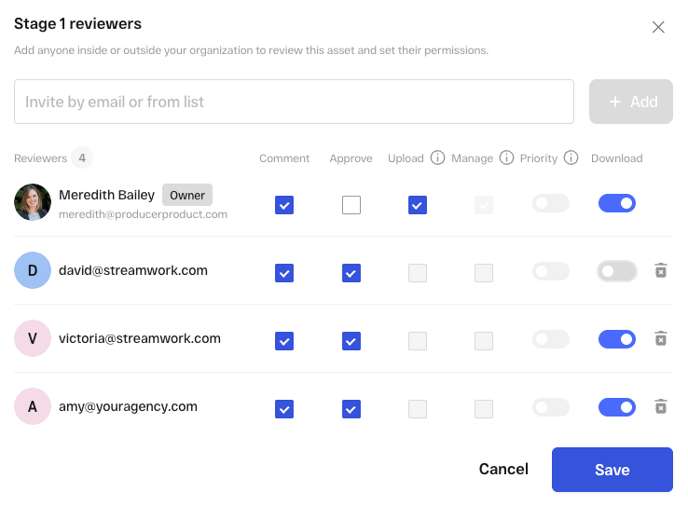
Note: Anyone can be added as a reviewer—whether they’re part of your organization or external. External reviewers don’t need a StreamWork account to access the review link and provide feedback. You can send unlimited review links at no cost, making it simple to collaborate with clients, vendors, or stakeholders outside your team.
Review Permissions in StreamWork:
Review permissions in StreamWork define what each reviewer can do during an approval workflow—such as leaving comments, making approval decisions, uploading new versions, managing the workflow, or marking priority feedback. You can define review permissions per reviewer in the approval routing set-up, just check or uncheck which permissions you'd like to grant each individual.
- Comment: Reviewers can leave feedback directly on creative media. Comments are tied to specific time codes, pages, or placements so feedback is always actionable and in context.
- Approve: Reviewers can make formal approval decisions on a media. Options include: Approved, Not Approved, or Approved with Feedback.
- Upload: Reviewers with this permission can upload new versions of a media file into an active approval workflow, keeping projects moving without waiting for the core team.
- Manage: Grants full control over the approval routing. Reviewers with Manage permissions can view and adjust all aspects of the workflow—adding or removing reviewers, managing priority comments, editing stages, and more. Approval managers can also assign this permission to teammates to share workflow ownership.
- Priority: Marks reviewer comments as high priority. A 🔥 emoji highlights these comments in the Media Viewer, making them stand out. Only internal team members can see priority flags, and comments can be sorted by priority for fast navigation.
Note: Only the person who originally routed the media for approval, and those with approval routing "manage" permission, can see priority comments. Otherwise, priority comments are hidden to all other users and reviewers.
- Download: Reviewers can download the creative media shared with them for offline access or reference.
- View Only: All reviewers have view access by default. To intentionally restrict a reviewer to view-only mode, simply toggle off all other permissions.
5. Once all reviewers are added to a stage, decide whether you’d like to create additional stages. If so, simply repeat the same steps outlined above.
6. Next, move to the "Settings" step in the approval workflow builder, where you can customize advanced options for your workflow. Learn more about approval settings in this Help Center article.
7. Finally, you’ll land on the "Final review" step. Here, you can double-check your workflow setup before going live. You’ll also have the option to save the workflow as a reusable template for future use. When you’re ready, launch the workflow—and StreamWork will automatically send review links to all reviewers in the first stage to kick things off.

Note: Media is routed sequentially through each stage of approval—starting with Stage 1, then moving to Stage 2 once Stage 1 is complete, and so on. You can monitor the status of all approvals and reviewer activity at any time in the Projects → Approvals tab.
Learn more about how to track approval routing reviews and decisions in this Help Center article.